Google Draw Graph Supply and Demand
Important Note: You can now receive supply and demand zones for all 4 major currencies sent to your inbox each day by signing up, just use the form found below the summary of this article.
Drawing supply and demand zones is a skill many people fail to master correctly.
Ever since supply and demand trading first came to prominence 4 -5 years ago there have been many different interpretations of how to draw the zones properly. This is to be expected since everyone has their own method of trading supply and demand zones. Today I want to give you the definitive guide on how to draw the zones correctly as well as a quick overview on how to locate supply and demand zones in the forex market.
Locating Supply And Demand Zones
Before we get to how to draw the zones I think its best if I show you how to locate actual supply and demand zones in the market just in case anybody is new to the supply and demand trading method.
Firstly I recommend you go and read my other article on supply and demand trading titled "Supply And Demand Trading The Essential Guide" to understand how I trade the forex market using supply and demand zones.
The method I use differs greatly to how the majority of traders trade supply and demand and the rules I use to determine whether a zone has a high probability of working out successfully are also unlike the rules implemented by the vast majority of supply and demand traders.
My strategy is based on the most well-known rules given by Sam Seiden which are found in typical supply and demand trading methods, but with some small tweaks which bring them more in-line with the reality of how the forex market really works.
Locating Supply Zones
Supply zones can be located by looking for a swift drop away from either a single candle or small consolidation structure is commonly known as a base.
The Base
The base consists of a few candlesticks in a tight sideways range (consolidation)

This is an example of a supply zone formed with a base.
Below is an example of a supply zone formed from a single candle.

Finding Demand Zones
Demand zones are found when the market makes a large move up from a single candle or a base.
Below is an example of a demand zone created from a single candle: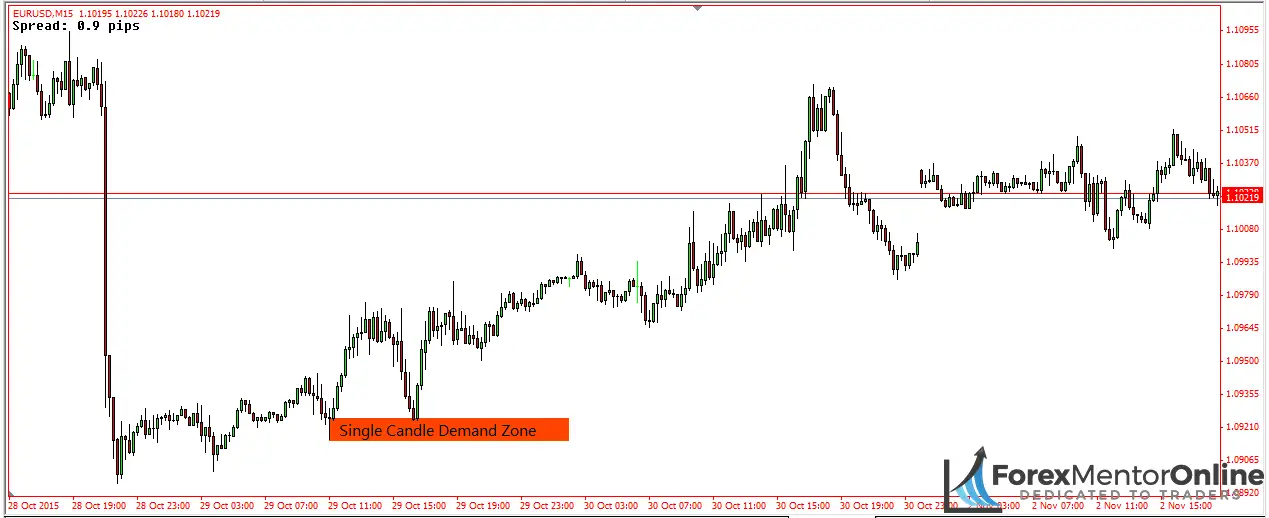
Here is an example of a demand zone with a base……

All of these images show the only two types of supply and demand zone that exist in the forex market.
A zone is constructed of either a single candle or a base, there are no other types of zones.
The strength of the movement away from supply or demand zone is not a determining factor in how strong the zone is.
As long as a zone has at least one large bullish or bearish candle moving away from it's considered just as valid for trading as a zone which has a significant move away from it.
Zones With A Base Result In More Successful Trades
Typically supply or demand zones which are formed from a base tend to result in more successful trades than zones which form from a single candle.
This is due to the sensitive nature of the psychology of the traders who have were in trading positions back when the base was being created.
When the market swiftly moves up or down in the case of supply and demand zones it negatively affects the psychology of the traders who had trades placed in the base before the market made its move up or down.
A zone which forms with a single candle means not a lot of traders were caught on the wrong side of the market before the market moved up or down creating the supply or demand zone. A zone with a base contains far more trapped traders because the market was moving sideways in a consolidation before it began advancing higher or falling lower.
When the market returns to a zone formed from a base the traders who were trapped either long or short (depending on the zones) will begin closing their trades. Them closing their trades coupled with the additional buying or selling of traders trading the up or down move into the zone creates liquidity in the market.
This liquidity allows the bank traders to sneak their trades into the market without many people noticing, which is why the market moves out of a supply or demand zone when it returns.
How To Draw Supply And Demand Zones
Now we know how to find and locate supply and demand zones on our charts the next thing for us to do is actually draw the zones themselves.
Both single candle supply and demand zones and zones with a base are drawn in the same way.
We'll begin by drawing a supply zone.
To draw the zones you first need to select the rectangle tool found in the INSERT tab on MT4.

Now find the zone you want to mark and draw the rectangle from the OPEN of the LAST bullish candle before the drop which created the supply zone.
Note:
You always draw supply zones from the last BULLISH candle before the drop, if the candle immediately before the drop is bearish, then you need to locate the most recent bullish candle and draw the zone accordingly.

The open of the bullish candle with the arrow above it is where you want to begin drawing your supply zone from.
Once you've done this you need to drag the rectangle up to the most recent high before the drop, in the image above the high is found at the top of a bearish pin bar.
Drawing Demand Zones
Demand zones differ from supply zones in that we are drawing the zone from the most recent BEARISH candle foundimmediately before the up move creating the zone.
 In the image you can see I've drawn the demand zone from the open of the bearish candle found just before the market made its move up forming the zone.
From here you need to find the most recent low nearest the zone and drag your rectangle to the low, now you have the demand zone drawn on your charts.
In contrast to when we are drawing supply zones the candle your drawing the demand zone off must be bearish. If it happens to be bullish you need to go back and locate the nearest bearish candle before the move up and draw your rectangle from there.
The reason why this is important is due to how the banks place trades, banks do not place trades onto movements which are in the direction of the trade they are placing.
In simple terms, if the current candle is bullish the banks wont be placing buy trades, if its bearish, they wont be placing sell trades.
This happens due to the nature of the orders currently present in the market. If you see a bullish candle it means the majority of the orders coming into the market are buys either from traders closing their trades at a loss or reactive traders placing trades just because they have seen the market move.
It's the same situation with bearish candles, most of the orders present during the formation of bearish candles will be sell orientated for the same reasons mentioned above .
So the main reason we always draw the zones from the last bullish or bearish candle is due to this being the last place the bank traders are likely to have been active in placing their trades.
Summary
I hope this guide has given you a greater understanding of how to locate and draw supply and demand zones. I sometimes forget how difficult things can be for traders who are not adept at new strategies and trading methods, figuring out even the simplest things can be a very challenging experience especially when there are multiple different trading styles and techniques found within one core trading method.
Thanks for reading, please leave any questions you have in the comment section below.
Google Draw Graph Supply and Demand
Source: https://forexmentoronline.com/how-to-easily-draw-supply-and-demand-zones/